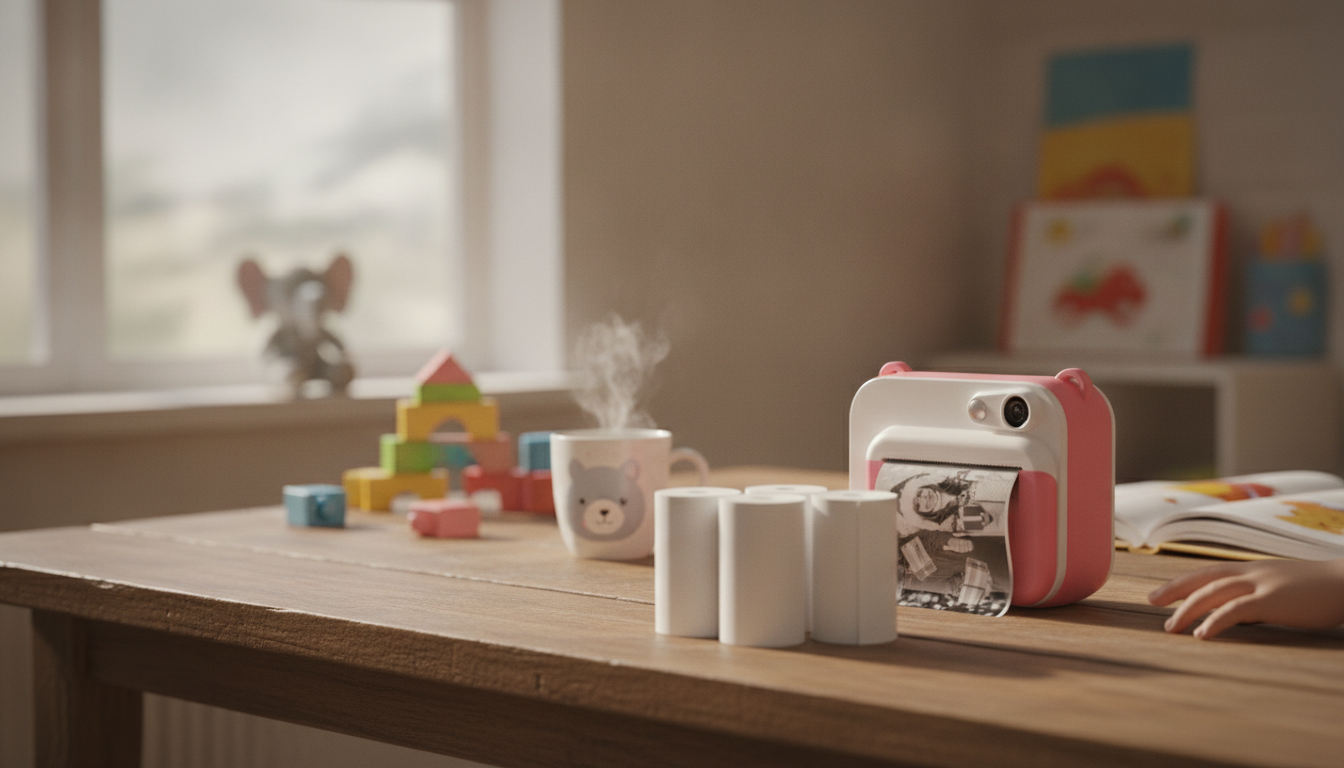
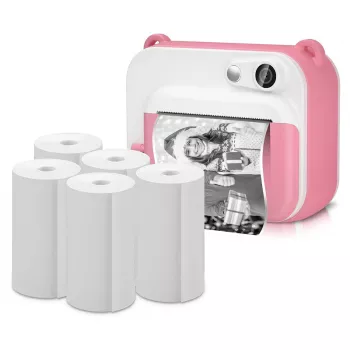
Kids’ instant-print cameras are at their best when the paper is always ready: quick to load, consistent to print, and easy to store for later projects. A multi-roll pack keeps play moving—whether it’s party snapshots, sticker-style scrapbooks, or daily photo journals—without constant mid-activity refills.
Instant thermal paper uses heat to create an image—so there’s no ink cartridge to replace and no messy refills to deal with. That’s exactly why kids’ instant-print cameras feel so “grab-and-go”: pop in a roll, press the shutter, and a black-and-white print appears in seconds.
At the same time, thermal prints are designed for quick snapshots, labels, and craft keepsakes rather than long-term, archival photo quality. The print tone and clarity can vary based on the camera’s print head condition, battery level, and any density/temperature settings your camera offers. For the cleanest results, keep the print head area free of lint and use paper that’s been stored away from heat and sunlight so it doesn’t pre-darken.
For families who print often, a multi-roll refill pack is the easiest way to avoid the classic “out of paper” moment right in the middle of an activity. The 5 Rolls of Instant Thermal Printing Paper for Kids Camera is a practical add-on that supports longer play sessions and fewer interruptions during trips, birthdays, and school craft time.
It’s also handy as a backup set to keep in a backpack, a travel pouch, or an activity drawer—especially if you have multiple kids’ cameras in rotation or a regular routine like a daily photo journal.
Thermal printing is low-mess, but crafting rarely is. If you’re setting up a dedicated “camera + crafts” station, a few simple extras can make cleanup and hygiene easier: a Elegant Handmade Ceramic Soap Dish by the sink for quick handwashing, and a Handheld Steam Cleaner to freshen high-touch areas like tabletops, chair seats, or sticky craft corners after a busy weekend.
Not all kids instant-print cameras use the same roll size or loading orientation. Before ordering refills, verify the roll width and the core size (the inner hole). Then confirm the camera is actually a thermal-roll model (not dye-sublimation or ZINK-style sheets). Finally, check whether your camera needs the paper to feed from the top or bottom of the roll—loading it backwards can lead to blank prints.
| What to check | Why it matters | How to confirm |
|---|---|---|
| Roll width | Paper must sit flat and feed straight | Measure the old roll or check camera specs |
| Core size | Wrong core can wobble and cause jams | Compare the old roll’s inner hole to the new roll |
| Feed direction | Incorrect loading prints blank or crumples | Look for arrows/diagram inside the paper door |
| Paper type | Non-thermal paper will not print | Camera description/manual mentions thermal printing |
Most feeding problems come from a roll that’s seated too tightly or a paper “leader” that wasn’t pulled far enough past the cutter edge. Use this quick routine:
Thermal paper is generally intended for everyday handling, but it’s still smart to promote handwashing after long crafting sessions—especially before snacks. For families who want to read more about BPA and related topics, these references are a helpful starting point: U.S. Food & Drug Administration (FDA) — BPA information, NIH NIEHS — BPA overview, and European Chemicals Agency (ECHA) — BPA overview.
No—roll width, core size, and loading orientation can vary by camera. Check the camera’s manual or match the dimensions and loading direction of the roll that originally came with your device.
The most common causes are a low battery, paper that has been exposed to heat, or a print head that needs gentle cleaning. Recharge the camera, try a properly stored roll, and follow the camera maker’s instructions for cleaning the print area.
Keep rolls sealed, cool, and dry—away from sunlight and heat sources. Avoid storing them in cars, near windows, or next to warm electronics where heat can prematurely darken the paper.


Leave a comment